Monday, May 14, 2012

Caramelized Onion Flatbread

On a recent trip to Florida we stopped into a restaurant to have a bite to eat.  The flatbread on the menu was too good to pass up.  Caramelized onions, figs and chicken – a delicious combination.
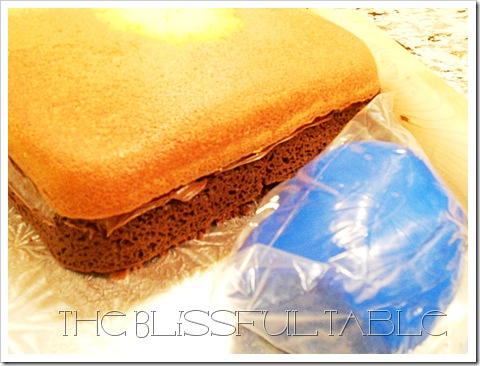
The recipe is basic and wasn’t hard to duplicate.  I also made another and added my own ingredients. To make it even easier I used a ready made Naan.  You can certainly opt to use a bread dough, which I intend to do next time I make these.
These are not so much recipes as they are just ideas.
Flatbread (16)a
Ingredients  for Caramelized Onion & Fig Flatbread
Naan bread (or pizza dough)
2 Seasoned chicken breasts
6 or 7 large onions (enough for about 3 or 4 flat breads)
Butter
1/4 to 1/2 cup brown sugar
Fig spread
8 Dried figs
Flatbread (2)a
Preparation
Preheat oven to 350.  Peel and slice onions.  In a hot pan heat 3 tablespoons of butter and less than a tablespoon of oil. Cook onions over medium heat for the first 10 minutes.  Add a pinch of salt.  Cook over medium low heat for the remainder of the cooking time and add brown sugar to cook with the onions.  While your onions are cooking slice chicken breast into small strips and fry or grill chicken breast with salt, pepper, garlic (whatever seasoning you like). I actually like steak seasoning on my chicken.
headboard 124a
Cut dried figs into quarters and add to a saucepan with one cup of water and let boil.  Stir and add small amounts of water as it evaporates.  Cook for about 20 minutes and eventually let all the water absorb, then remove from heat.
Place the Naan directly on your oven racks of the preheated oven and toast for about  5 minutes.
Once the Naan is toasted assemble your flatbreads starting with some fig spread.  Spread a thin layer all over the Naan, then add a few cooked figs,  caramelized onions and then your chicken.  Garnish with any greens you like.  Pop them back in the oven for 5 minutes if you like.

headboard 129a
One of the flatbreads below had caramelized onions, goat cheese, bocconcini cheese and shaved parmesan cheese.
headboard 137a
These were fabulous and there are endless combinations. Give them a try!
Enjoy !


Tuesday, April 10, 2012

Polenta Rounds with Caramelized Onion, Prosciutto & Provolone

I’ve always liked Polenta.  It’s an awesome base for just about any topping.  You can eat it in so many different forms, but grilled or baked is my favorite.  This recipe is neither grilled or baked, but pretty darn fast and easy.  And the caramelized onion……. to die for!

DSCN4053b

Polenta takes a long time to cook, typically simmering in four to five times its volume of watery liquid for about 45 minutes with almost constant stirring, necessary for even gelatinization of the starch. There are alternative cooking techniques meant to speed up the process, or not to require supervision. Quick-cooking (pre-cooked, instant) polenta is widely used and can be prepared in a few minutes; it is considered inferior to cooking polenta from unprocessed cornmeal.

But I used it anyway~!

DSCN4040a

Ingredients

(makes roughly 24 rounds)

2 cups milk

2 cups water

1-1/2 cups polenta

1 teaspoon salt

1/2 cup grated parmesan cheese

1/2 teaspoon of soft butter for your hands, (optional)

3 cups chopped onion

2 tsp butter

2/3 cups brown sugar

8 oz mozzarella

1/4 lb prosciutto  sliced thin

just enough shaved aged provolone to top about 24 rounds

Preparation:

Bring the milk and water just to a boil in a large saucepan. Slowly stream in the polenta while stirring constantly. Dumping the polenta in will result in lumps.  Stir in the salt and turn down the heat a bit if needed (you don't want the polenta to scorch). Continue stirring until the polenta thickens up.  If using the usual store bought polenta this should take a few minutes. Stir in the cheese.

DSCN4041a

Remove from heat and spread out 1/2-inch thick onto a baking sheet covered with parchment paper.  At this point you could use a wooden spoon or a spatula  to smooth it out, but I waited a couple of minutes till it was slightly cooler then rubbed little soft butter on my hands and smoothed it out that way. Chill in a refrigerator for at least an hour till completely cool.  Your polenta can be made the day before as well.

While your polenta is cooling caramelize your onions with the butter and brown sugar over medium heat.  Once they start to cook, lower the heat to prevent them from burning.  Stir frequently.  Caramelizing onions is a slow process and should be done over low heat until you reach the desired softness and sweetness.

DSCN4046aThey’ll look very brown and taste very sweet when they’re done.

DSCN4047a 

I used about a 2” cookie cutter for my rounds.  I thought they were the perfect size to accommodate all the toppings.  I got about 24 rounds with this size.

DSCN4049a


Top the rounds with your caramelized onions then a small bit of mozzarella cheese.

DSCN4052a

At this time I popped them under the broiler for less than 5 minutes just to get the cheese to melt.

When the cheese is melted just enough not to have it run all over the onions, add a small cut slice of prosciutto and a shaved slice of aged provolone.

DSCN4053c 

This appetizer was travelling with me, so I brought them in the tray as pictured above.  When we got there we popped them in the oven again for about 10 minutes.  They were delicious warm, but when they cooled down again we were still eating them.  

Warm or cold, these are to die for.

blissful table signature new_thumb[1]_thumb[1]

Sunday, March 11, 2012

Homemade Gnocchi

I’ve always loved homemade Gnocchi, but not near as much as my oldest daughter.
Jessica is a Gnocchi junkie.   So for her 23rd birthday today, I decided I’d give it a try.  I was surprised at how simple it really is.  There are a few rules that you must follow to ensure light and tender gnocchi.
Here is what I have learned…
Keep potatoes whole and in their skins to boil. You don’t want them to absorb excess water.   I riced the potatoes while they were warm to get them through the ricer better.   Make sure to let them cool COMPLETELY before moving on to the next step. The riced potatoes need to cool so that excess water evaporates.  If you mix flour into warm moist potatoes they will absorb more flour and your gnocchi’s will be  heavy.
Homemade Gnocchi 046a
First I had to get myself a potato ricer.  You can use a ricer or a vegetable mill.   I’ve read that a ricer makes for lighter gnocchi. Use the attachment with the smaller holes.
ricer
So lets get to it.
Ingredients
6 large russet potatoes
2 tablespoons salt plus 1 teaspoon
1/4 tsp white ground pepper
2 eggs beaten
3 – 4 cups unbleached flour
Sauce of your choice
Homemade Gnocchi 041a
Preparation
Boil the potatoes whole and  in their skins about 40 minutes, until they easily pierce with a  skewer. When cool enough to handle, peel the potatoes and take off any imperfections left behind.  Cut each potato in half and rice them into a baking sheet spreading them loosely so they cool completely or you can  rice them right on the counter and spread them out there to cool. (Make sure they are cool before moving on). At this point, bring 6 quarts of water and 2 tablespoons of the salt to a boil. On a cool, preferably marble work surface, gather the cold riced potatoes into a mound, forming a well in the center. Stir the remaining 1 teaspoon salt and the white pepper  into the beaten eggs and pour the mixture into the well.
Homemade Gnocchi 048a

Work the potatoes and eggs together with both hands, gradually adding 3 cups of the flour and scraping the dough up from the work surface with a knife as often as necessary. (Incorporation of the ingredients should take no longer than 5 minutes.  The dough will be smooth but slightly sticky.  Remember the longer the dough is kneaded, the more flour it will require and the heavier it will become. Dust the dough, your hands, and the work surface lightly with flour and cut the dough into six equal parts. Continue to dust dough, hands, and surface as long as the dough feel sticky.  Your dough should like like this.. moist and grainy.
Homemade Gnocchi 050a
Using both hands, roll each piece of dough into a rope 1/2-inch thick, then slice the ropes at 1/2-inch intervals. At this point you can indent each dumpling with your thumb or use the tines of a fork to produce a ribbed effect. (Apparently this practice of ribbing the gnocchi allows the sauce to stick to them).  I left mine plain.  After cutting the pieces toss them lightly in flour to ensure the cut edges are lightly coated.

Homemade Gnocchi 017a
Shaking excess flour off, drop the gnocchi into boiling water a few at a time, stirring gently and continuously with a wooden spoon, and cook for 2-3 minutes, until they rise to the surface. Do not overcook.
Homemade Gnocchi 037a

Homemade Gnocchi 031a
Remove the gnocchi from the water with a slotted spoon or skimmer, transfer them to a warm platter, adding your sauce of choice.  Don’t overcrowd them in the water. Boil in batches if you have to.  Add sauce and grated cheese, Serve immediately.
To freeze gnocchi:
It is best to freeze gnocchi uncooked as soon as they are shaped. Arrange the gnocchi in a single layer on a baking pan and place the pan in a level position in the freezer. Freeze until solid, about 3 hours. Transfer the frozen gnocchi into portion size resealable freezer bags. Frozen gnocchi can be stored in the freezer for 4 to 6 weeks.
To cook frozen gnocchi:
Frozen gnocchi must be cooked directly from the freezer in plenty of boiling water, or they will stick together. Bring 6 quarts salted water to a boil in each of two large pots. Shake any excess flour from the frozen gnocchi and split them between the two pots, stirring gently as you add them to the boiling water. It is important that the water return to a boil as soon as possible; cover the pots if necessary. Drain the gnocchi as described above and sauce and serve according to the specific recipe.
Homemade Gnocchi 043a
Don’t forget the cheese!
Enjoy ~
blissful table signature new_thumb[1]

Monday, February 27, 2012

Breville Pie Maker

I’ve been wanting one of these baby’s for quite a while.  My daughter picked up my ‘subtle’ hints and gave me one for Christmas.  I’ve been busy pie making since.

Breville Pie Maker 008a

This little fella can get you out of a jam pretty darn quick.  I’ve been invited to a few impromptu gatherings and the same question pops into my head about 5.5 seconds after accepting such and invitation…

“What am I gonna make??”

Pastry is very easy and should be a staple in your kitchen, (at least keep a batch in the freezer).  When you’re in a REAL pinch, keep a couple of tins of ready made blueberry or cherry pie filling on hand as well.  I had cherry, blueberry and homemade cinnamony apple pie filling!

Breville Pie Maker 001a

THREE Things to keep in mind:

Breville suggests using puff pastry.  I did… but my personal preference is ordinary homemade Tenderflake pastry.  I’ll tell you why…. I found the puff pastry to shrink, crinkle and wrinkle on the top when the pies cooled.  I didn’t like the look. I tried different combinations too, puff pastry on top/pie pastry on bottom, puff pastry on top and bottom. I’m sticking with pie pastry.

All fillings have to be cooked and cooled.  The pie maker really just cooks the pastry and heats up the filling.  The pies are not in there long enough to cook the fillings.

The Breville instructions also suggest you use 1/3 cup of filling, I used more.. and I’ll tell you why again.. If the pies aren’t filled enough, the top pastry doesn’t touch the top heated element and doesn’t brown.  Filling them a little more makes them brown beautifully.  I also cut some air holes in my top crust so steam could escape making the pies crimp and seal better.

Follow all the instructions given with the pie maker (plus my little added tips) and you’ll have four spectacular pies in minutes.

Breville Pie Maker 011a

My first couple of batches were trial and error.  I made up my mind after the first batch of puff pastry, that I didn’t like that as much as pie pastry.  Trial and error on how much to fill them as well, but they turned out great once I got it down to a science.

Breville Pie Maker 015a

If they cool and you want them warmed up again, they warm up lovely in the oven.

Breville Pie Maker 024a

Is that not the cutest thing you’ve seen !?

Breville Pie Maker 032a

Enjoy !

blissful table signature new

Wednesday, October 12, 2011

Autumn Pumpkin Pie

This Thanksgiving I made an Autumn Pumpkin Pie.  The pumpkin pie was made from canned pumpkin mixed with cinnamon, nutmeg, ginger and cream.   E.D. Smith Pumpkin is my pumpkin of choice.   Pastry is homemade using Tenderflake and following the recipe on their box.  I’ve tried other pastry recipes but I like Tenderflake.

The real reason I wanted to post this is just to show you how to dress up your pumpkin pie.

Using the same leaf cookie cutters I used on the Fall Apple Pie,  I cut pastry leaves with the smallest cutter for the edges and a couple of larger for the centre.   Remember to brush your pastry with milk and sprinkle with a little granulated sugar before baking. 

Just and idea for your own Thanksgiving.   Gobble Gobble !

Thanksgiving pumpkin pie 017b

Thanksgiving pumpkin pie 006a

Thanksgiving pumpkin pie 021a

Enjoy !

lisapinkfork_thumb[1]

Thursday, September 29, 2011

Fall Leaves and Apple Pie

I’m a HUUUGE fan of Fall and  I especially like to bake at this time of year.  What else says FALL more than beautiful leaves and apple pie? Leafy Apple Pie ?

Leafy Apple Pie 049a

I made my own pastry the night before.  Bring your pastry to room temperature and set aside a small piece to color later on.  Size up your bottom shell and trim off excess.  Flute or crimp your pie crust with your fingers.

Leafy Apple Pie 006a

I also cooked my apples ahead of time and let them cool so they wouldn’t be hot when I placed them on the pastry.  The filling is simply apples, brown sugar, white sugar, cinnamon and a little flour to absorb the liquid when cooking.  I do it by eye, so I have no exact measurements.   Fill your shell.

Leafy Apple Pie 010a

I thought about just placing the leaves right on the apples, but I thought a background piece of pastry might be nicer.  I used a bowl to cut out a circle smaller than the pie dish so that there would be a rim of apples around the pie.

Leafy Apple Pie 012a

Color the piece of pastry you set aside with GEL food color.  If you use liquid your pastry will be too moist and sticky.  I left the color semi mixed in leaving an uneven marbled look.  I made the orange vivid enough to allow for the pastry to brown and still show color.

Leafy Apple Pie 013a

I’ve been wanting to make some fall leaf cookies with these leaf cutters, but for now I used them on the pastry.  I used all the sizes. 

Leafy Apple Pie 017a

When you’re done placing all the leaves brush your pastry with a little milk and sprinkle with sugar.

Leafy Apple Pie 018a

This is the cookie cutter set I used. 

(The actual leaves are from the vines on the front of my house)

Leafy Apple Pie 027a

Leafy Apple Pie 047a

Leafy Apple Pie 051a

mmmmm … and it was good too !

fall leaf

Enjoy !

lisapinkfork_thumb[1]

Sunday, August 14, 2011

Boxing Gloves Cake

So, my last cake for a while is for my daughters boyfriend Lucas.

Luca trains in M1 Thai Boxing and Nadia thought this would be a great cake for his birthday.

boxing gloves cake 016a

As I know NOTHING about sports, let alone boxing gloves, I looked around for the proper Thai Boxing gloves. We noticed that these gloves were flatter and more squared off at the top. 

In any case, I started off with a couple of rectangle simple butter cakes.  I made two separate cakes and cut each one into two layers.

This simple butter cake is one of the tastiest of the heavier cakes that is very easy to carve.

I made a paper template that I cut the cakes around.  Because there are two using a template keeps both cakes the same size and shape.

boxing gloves cake 001a

A very simple template and very simple to cut.

boxing gloves cake 002a

Crumb coat the prepared cakes with buttercream icing and refrigerate for about 20 minutes. I used half butter/half shortening buttercream because today is hot and humid!

Thankfully for this project I was able to get ready made RED fondant. What a treat that was. That sliced about 45 minutes and about 2 buckets of sweat off my day.

boxing gloves cake 005a 

Just a few finishing touches and we’re done.

boxing gloves cake 018a


boxing gloves cake 025a

boxing gloves cake 010a


boxing gloves cake 011a

Happy Birthday Luca !

boxing gloves cake 030a


lisapinkfork