Friday, June 17, 2011

Flower Cupcakes

I made 96 cupcakes for a Bridal Shower and each one was different.

cupcakes with flowers 001a

They are plain chocolate/vanilla cake, iced with a 1M tip with half & half buttercream icing.  Because these cupcakes will more than likely end up outside for a garden party, I opted to use the half butter/half shortening buttercream, specifically for the melt factor, (you can get that recipe here.)

The flowers were made from fondant that I colored with Wilton gel food coloring.

wilton color

I used a silicone flower mould with the colored fondant to make these pressed flowers. Simply press into the mould and refrigerate for about 10 minutes.  The flowers pop out perfectly. I make all fondant flowers and decorations a few days ahead to let them dry.

silicone mould


cupcakes with flowers 050a


One more little necessity for flowers. Pearl Dust. Nothing finishes flowers as beautifully as Pearl Dust.

pearl dust

A little glitter goes a long way.

cupcakes with flowers 005a

I took pictures of just a few, but my daughter and I noticed, no two were alike.

cupcakes with flowers 009a

cupcakes with flowers 013a

cupcakes with flowers 028a

cupcakes with flowers 037a


cupcakes with flowers 044a 


cupcakes with flowers 011a

cupcakes with flowers 034a

Congrats Sabrina & Matthew !

lisapinkfork

Thursday, May 19, 2011

Chicken Francese

This is another of my favorite chicken recipes.

"Chicken francese. An Italian-American dish of sauteed chicken cutlets with a lemon-butter sauce. The word francese is Italian for "French style," although there is no specific dish by this name in either Italian or French cookery."
---Encyclopedia of American Food and Drink, John F. Mariani [Lebhar-Friedman:New York] 1999 (p. 72)

Either way, it is a must try (in case you haven’t)

Chicken Francese 011a

Ingredients

4 skinless, boneless, chicken breasts (about 1-1/2 pounds)

flour, for dredging

salt and freshly ground black pepper

4 large eggs

3 tablespoons water

1/4 cup olive oil

1/2 lemon, with rind, cut in thin rounds

1/2 cup dry white wine

1 cup chicken broth

1/2 lemon, juiced (although I juice just about a whole lemon)

2 tablespoons butter

1/4 cup chopped parsley

Chicken Francese 005a


Chicken Francese 007a


Instructions

Pound the chicken breasts with a flat meat mallet, until they are about 1/4-inch thick. Put some flour in a shallow platter and season with a fair amount of salt and pepper; mix with a fork to distribute evenly. In a wide bowl, beat the eggs with 3 tablespoons of water to make an egg wash. Heat the oil over medium-high flame in a large skillet.

Dredge both sides of the chicken cutlets in the seasoned flour, and then dip them in the egg wash to coat completely, letting the excess drip off. When the oil is nice and hot, add the cutlets and fry for 2 minutes on each side until golden, turning once. Remove the chicken cutlets to a large platter and keep warm.

Toss the lemon slices into the pan and cook for 1 to 2 minutes, until fragrant. Add the wine, broth, and lemon juice, simmer for 5 minutes to reduce the sauce slightly. Roll the butter in some flour and add it to the skillet, this will thicken the sauce. Stir to incorporate and dissolve the flour.

Reduce the heat to medium-low and return the chicken to the pan. Simmer gently for 2 minutes to heat the chicken through. Season with salt and pepper and garnish with chopped parsley before serving.

Chicken Francese 016a

Enjoy !


lisapinkfork

Saturday, May 14, 2011

A Thing or Two about Buttercream

There are a lot of buttercream recipes, some call for just shortening, some are all butter, some are a mixture of butter and shortening.  I prefer the all butter version, but there are times when butter buttercream can fail you.
If you are icing your cake in humid, warm or hot temperatures, pure butter buttercream can definitely give you problems.  Even if you manage to get your cake decorated in the perfect temperature, transporting it can be a problem as well.  This is why most bakers put shortening in their buttercreams. The melting point of shortening is roughly 10 – 20 degrees higher than butter.  Much more stable.

For this roses cake, I followed the basic Butter recipe but added a few more tablespoons of icing sugar to make it stiffer and since I didn’t have to transport this cake, simply refrigerating it was good enough. For roses, use a 1M tip.

buttercream roses cake 010a
The Basic Butter Buttercream
1 cup salted butter, softened
4 cups fresh confectioners sugar (icing sugar)
4 teaspoons vanilla (clear if you want very white icing)
6 tablespoons milk or cream
(makes about 5 cups of frosting)

Roses Cake 084a
Butter and Shortening Buttercream
1/2 cup salted butter, softened
1/2 cup shortening
4 cups fresh confectioners sugar (icing sugar)
1 teaspoon vanilla extract (clear if you prefer)
2 tablespoons milk
(makes about 3 cups of frosting)
buttercream roses cake 002a

Citrus Buttercream
(follow either of the above recipes)
substitute lemon or orange juice for the milk
omit vanilla
Stir in 1/2 teaspoon grated lemon peel or 2 teaspoons grated orange peel


Shortening Buttercream
2 cups shortening
8 cups confectioners sugar
1/2 teaspoon salt
2 teaspoons clear imitation vanilla extract
6 fluid ounces heavy cream
(makes about 5-1/2 cups of frosting)

Instructions
In large bowl, cream shortening and/or butter with electric mixer. Add vanilla. Gradually add sugar, one cup at a time, beating well on medium speed. Scrape sides and bottom of bowl often. When all sugar has been mixed in, icing will appear dry. Add milk and beat at medium speed until light and fluffy. Keep bowl covered with a damp cloth until ready to use.
For best results, keep icing bowl in refrigerator when not in use. Refrigerated in an airtight container, this icing can be stored 2 weeks. Rewhip before using.

buttercream roses cake 006a
Enjoy !


lisapinkfork

Sunday, March 13, 2011

Football & Race Cars & Wii, OH MY!

This past weekend was extremely busy in my kitchen.

We celebrate THREE birthdays at once, my eldest daughter, her boyfriend and my nephew.

I thought about making one cake with something to represent all three, but my daughter had her heart set on her own cake.. and it had to be pink~!

So that left me in the kitchen baking cakes the days before, and two straight days of cake decorating.

This is what I came up with ~ three SMALL personal sized cakes.

You’ll have to forgive the lack of instructions and during pictures, but as you can appreciate, time wasn’t exactly on my side.


JULIAN’S CAKE

My nephew is a HUGE football fan and like any fan, he has his favorite team, so I thought I’d go with that.

football helmet cake1a

Football helmet cake 2a

Of course we needed a creative base to put the helmet on. Just a regular square cake board covered in green fondant and white fondant.

football helmet cake 4a

football helmet cake 3a

I will tell you that I made an 8” round pan cake and then put the majority of the batter in a Pyrex bowl and baked it in that. This actually helped me get the round shape and allowed for much less wastage and carving.

Birthday Cakes 022a

This is my handsome nephew with his football cake.

football helmet cake5a


MICHAEL’S CAKE

Michael is and Insurance man by day and a race car driver by night. This year he will be driving a 1933 Willys Coupe..AWESOME car!

So … The adventure seeker in me thought.. why not?


car cake 8a


This cake started off in 2 different size loaf pans. (cakes are frozen here)

car cake 3a

And the base was on a glass cutting board covered with black fondant to look like an oil slick or tar.

car cake 5a

It turned out kind of cartoony…I liked it.

car cake 2a

car cake7a

And here is Michael just after the sparkler went out. By the way, Michael refused to actually cut the cake…haha!

car cake 9a


and finally,

JESSICA’S CAKE

My Jessica has become a bit of a Wii fanatic, so this was perfect for her.  A replica of her hot pink Wii Controller complete with little Mii’s of all of us who play.

wii controller cake 1a

The easiest shape of the cakes, very simple 2 layered carrot cake, crumb coated and covered with fondant. The strap was also made of rolled fondant, very thin and textured with the ties of my apron..(just for effect)  The Mii’s also all fondant and food coloring pens.

wii controller cake 2a

wii controller cake 3a

I have to show you how these Mii’s actually look when we are playing the game.  I think they’re hilarious.

wii controller cake 4a

wii controller cake 10a

And here is Jess… thrilled with her cake (and dying to press “A”)

wii controller cake 11a

Well there ya have it.  I’m EXHAUSTED.  But I have to tell you what I thrill I get seeing their faces.

It is sooooo worth the work!

Happy Birthday kidlets.  I love you all!


lisapinkfork

Sunday, February 27, 2011

Hermit Cookies

I’ve seen a few recipes for Hermit Cookies, but I liked this one best.  Most seem to call for shortening, but this recipe contains butter.

They are soft and chewy and can be made with the sugar glaze or eaten without..(I prefer WITH).

Hermit Cookies 022a

Ingredients

1/2 cup (113 grams) unsalted butter, room temperature

1 cup (200 grams) light brown sugar

2 large eggs

1/2 teaspoon pure vanilla extract

1 1/2 cups (195 grams) all purpose flour

1 teaspoon baking soda

1/4 teaspoon salt

1 teaspoon ground cinnamon

1/2 teaspoon ground allspice

1/4 teaspoon ground cloves

1 cup (130 grams) dark or golden raisins

1 cup (135 grams) dates, pitted and coarsely chopped

1 cup (100 grams) pecans or walnuts, coarsely chopped

Hermit Cookies 007a

Glaze: (optional)

1/2 cup (55 grams) confectioners sugar (icing or powdered sugar), sifted

1/4 teaspoon pure vanilla extract (clear)

1 - 3 teaspoons milk or light cream

Hermit Cookies 016a


Preparation

Preheat oven to 350 degrees F (177 degrees C) and place rack in center of oven. Line two baking sheets with parchment paper.

In the bowl of your electric mixer, or with a hand mixer, beat  the butter and sugar until light and fluffy. Add the eggs, one at a time, beating well after each addition. Beat in the vanilla extract. Scrape down the sides of the bowl as needed.

In a separate bowl sift or whisk together the flour, baking soda, salt and spices. Add to the butter and egg mixture and beat until combined. Fold in the raisins, chopped dates, and chopped pecans.

Drop the batter by teaspoons onto the prepared baking sheets, spacing the cookies about two inches (5 cm) apart. Bake for about 10 minutes or until the cookies or until lightly browned. Remove from oven and place on a wire rack for about 5 minutes before removing from pan. Cool completely before frosting.

Glaze (optional): In a small bowl stir together the sugar, vanilla extract, and enough milk (cream) to make a smooth, thick, yet pourable glaze. Once the cookies are completely cool, use a small spoon to drizzle several thin lines of the glaze over each cookie. Let the cookies sit at room temperature until the glaze has completely dried.

The cookies can be stored at room temperature for about five days.

Makes about 36 cookies

Hermit Cookies 029a

Truly comfort food ~

Enjoy !

lisapinkfork

Thursday, February 17, 2011

Valentine Cake Pops with Sara

A very special little girl (she’s really like a niece to me) asked if I would help her make something to take to school for Valentine’s Day.  After some emails back and forth, pictures, ideas and careful planning, she decided she would go with Cake Pops.  We actually made over 40 Cake Pops and most of them round and decorated with sprinkles, but don’t ask my WHY I don’t have any pictures of them!?

I did however take pictures of the very pretty heart shaped pops.

(To make the Cake Pops see instructions at the bottom of this post.)


Valentine Cake pops 015a

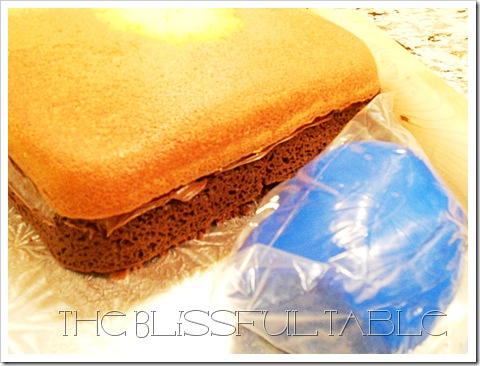
Some of the chocolate cake pops before and after being coated with melted candy coating.

Valentine Cake pops 006a

and my only picture of a round one

Valentine Cake pops 009a

Here’s my little helper Sara.

Valentine Cake pops 003a

and her mother Rosemary.

(I can safely say that we all looked a little fresher when the night began.)

Valentine Cake pops 004a

Valentine Cake pops 016a

I heard the cake pops were a huge hit with her classmates and teacher.

Good job Sara!

Valentine Cake pops 008

Basic Cake Pops

1 box of your favorite cake mix (1 cake should yield about 48 pops)

1 can of your favorite icing

8” lollipop sticks

Candy coating for melting

Sprinkles, candies, any candy decorations you like

Styrofoam brick or small box to hold sticks

Bake your cake according to directions in a single rectangle or oval pan, (no need to make two cakes)

cake pops halloween 027a

Let cake cool.  Crumble cake into crumbs in a large bowl.

cake pops halloween 030a

Add 3/4 of the container of frosting to the cake crumbs. I prefer not to use the whipped frosting as its just too soft.

frosting

Mix it all up then roll into balls about the diameter of a quarter. If you make them too big they’ll be too heavy and will fall off the stick when you try to dip them later.  Refrigerate for about an hour.  Take out a few at a time and work with them.  If the balls get too soft they’ll fall off the stick when you try to work with them.

cake pops halloween35a

Melt your candy melts in a deep bowl. I like to use a mug. Fill the mug 3/4 full. Microwave first about 1 minute. Stir and then microwave for 20 seconds at a time until completely melted. Do NOT over heat the candy, it turns into something completely different!! lol

candy melts

Dip your lollipop sticks in the melted candy about 1/2 inch then stick into the cake ball.  Insert stick only about half way in.  Let it sit and dry, do all your cake pops the same.


dipped pops1

Dip the cold cake pops into the melted candy. Dip straight down until you hit the stick and then quickly pull out. Tap the stick lightly on the edge of the bowl to shake excess off.  Keep twirling the cake pop until all the candy either drips off into the bowl or spreads evenly. Turn upright when dripping stops and stick into the Styrofoam to dry.

There are oodles of shapes, characters, colors and themes to try.  If you’re interested in making these you might want to invest in Bakerella’s Cake Pop book.

She really is a creative genius.

cake-pops-book

We all had a great time making the cake pops for Sara’s class.  They all realized that they really aren’t as easy as they look. But what a fun night! Thanks Sara, Rosemary, Peter, Mario and of course Robert (who so selflessly consumed all our reject pops), thanks Robert, it was a dirty job, but somebody had to do it.

All the work was worth this smile!

Valentine Cake pops 002a

lisapinkfork